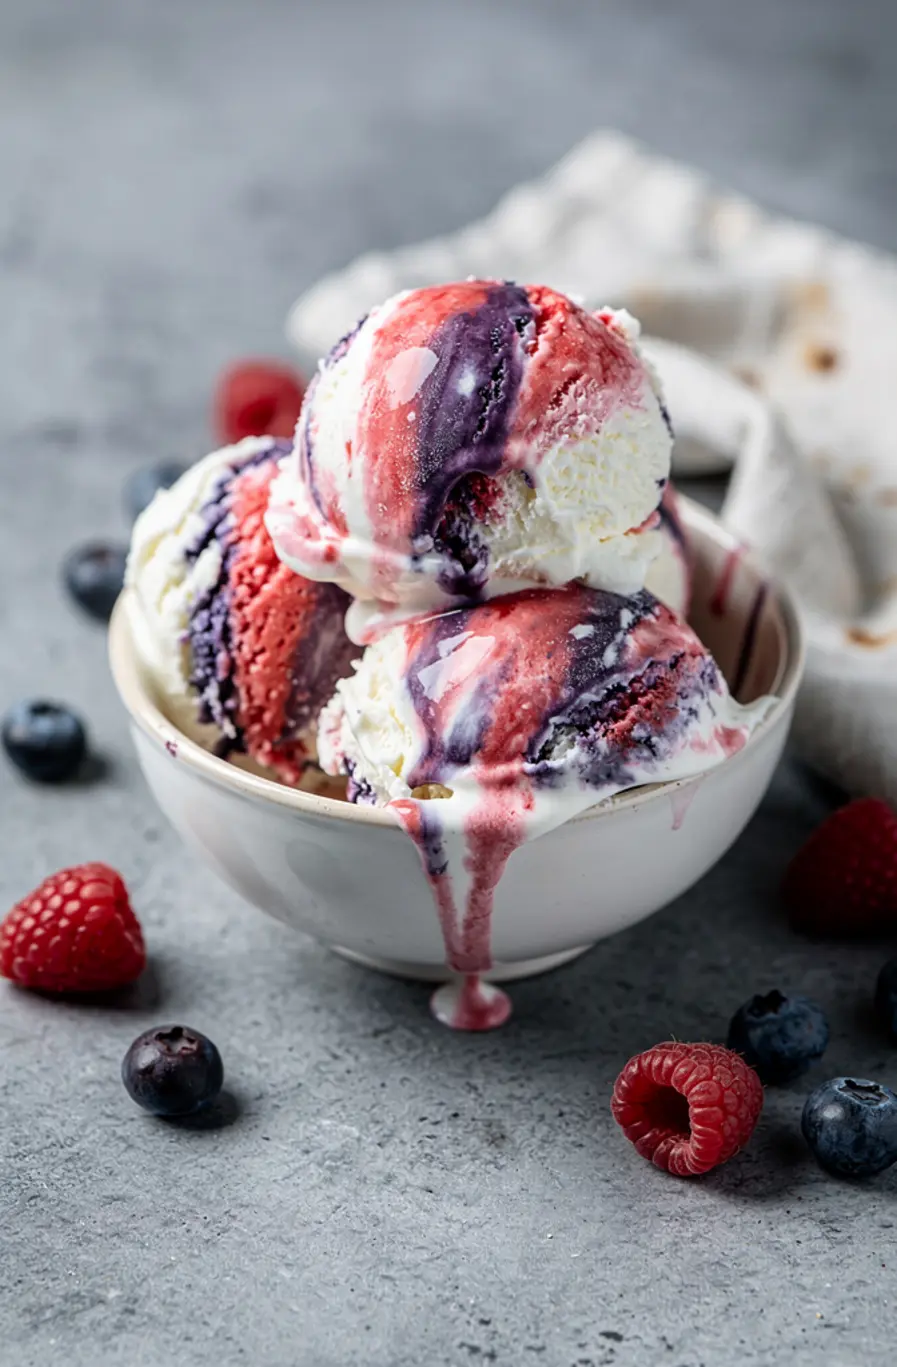
Easy Patriotic 4th Of July No-Churn Red White & Blue Swirl Ice Cream Recipe (3 Ingredients) In 390 Minutes!
Why I Created This 4th Of July No-Churn Red White & Blue Swirl Ice Cream Recipe (3 Ingredients)
I’ve always loved the idea of making ice cream at home, but I’ll admit, I was intimidated by the thought of needing an ice cream maker. Then I discovered no-churn ice cream, and it changed everything. It’s so simple—just whipped cream, sweetened condensed milk, and a little flavor—that anyone can make it, even if you’re a beginner in the kitchen. The best part? You can customize it however you like, which is why I knew it was the perfect canvas for a patriotic 4th of July dessert.
Last summer, I was hosting a small backyard barbecue for friends, and I wanted something special to serve for dessert. I’d seen those gorgeous red, white, and blue desserts all over social media, but so many of them looked complicated or required fancy tools. I wanted something easy, something that wouldn’t keep me stuck in the kitchen while everyone else was outside enjoying the sunshine. That’s when I decided to experiment with no-churn ice cream. I split the base into three portions, tinted them with food coloring, and layered them in a loaf pan. The result was a stunning, swirled ice cream that looked like it came from an ice cream shop—but it was so simple to make.
Since then, this recipe has become a staple in my summer dessert rotation. It’s a hit with kids and adults alike, and it’s always the first thing to disappear at potlucks. Plus, it’s a great way to get creative in the kitchen without stressing over complicated techniques. Whether you’re celebrating Independence Day, Memorial Day, or just a regular summer day, this ice cream is a crowd-pleaser that’s as fun to make as it is to eat.
5 Reasons You Will Love This 4th Of July No-Churn Red White & Blue Swirl Ice Cream Recipe (3 Ingredients)
First, it’s incredibly easy to make. You don’t need an ice cream maker or any special equipment—just a mixing bowl, a whisk, and a little elbow grease. The no-churn method is foolproof, even if you’ve never made ice cream before. It’s a great recipe to make with kids, too, since there’s no cooking involved and they’ll love helping with the swirling.
Second, it’s customizable. While this version is all about the red, white, and blue for the 4th of July, you can easily adapt it for other holidays or occasions. Swap the food coloring for pastel shades for Easter, or go green and red for Christmas. You can also mix in other flavors, like crushed cookies, chocolate chips, or even fresh fruit, to make it your own.
Third, it’s creamy and delicious. The combination of whipped cream and sweetened condensed milk creates a rich, velvety texture that’s just like the ice cream you’d buy at the store. It’s sweet but not overpowering, and the vanilla flavor shines through. Plus, the swirls of color make every bite look as good as it tastes.
Fourth, it’s a showstopper. Let’s be honest—there’s something magical about serving a dessert that looks like it took hours to make, even if it only took a few minutes of active prep time. Your guests will be impressed by the vibrant colors and the beautiful swirls, and they’ll be even more impressed when you tell them how easy it was to make.
Fifth, it’s perfect for summer. Ice cream is the ultimate warm-weather treat, and this recipe is no exception. It’s light enough to enjoy after a big meal but rich enough to satisfy your sweet tooth. Plus, it’s a great way to cool down on a hot day. Serve it with fresh berries, a drizzle of chocolate sauce, or just on its own for a simple, refreshing dessert.
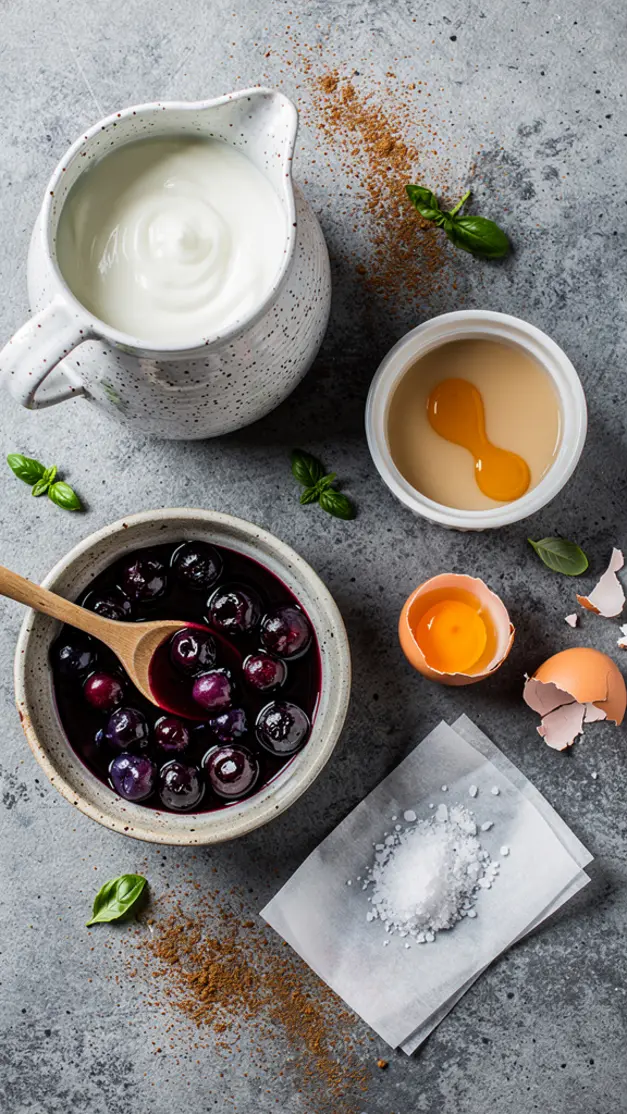
Ingredients for 4th Of July No-Churn Red White & Blue Swirl Ice Cream Recipe (3 Ingredients)
- 2 cups heavy whipping cream, cold
- 1 (14 oz) can sweetened condensed milk
- 1 teaspoon vanilla extract
- Red food coloring
- Blue food coloring
Substitutions: If you want to make this recipe dairy-free, you can swap the heavy whipping cream for full-fat coconut cream. Just make sure it’s well-chilled before whipping. For a lower-sugar option, you can use a sugar-free sweetened condensed milk, though the texture might be slightly different. If you don’t have vanilla extract, almond or coconut extract would work well too—just use a little less, as they’re more potent.
Tools You Need to Make 4th Of July No-Churn Red White & Blue Swirl Ice Cream Recipe (3 Ingredients)
- Large mixing bowl
- Electric mixer (hand or stand)
- Rubber spatula
- Loaf pan or freezer-safe container
- Plastic wrap
- Measuring cups and spoons
How to Make 4th Of July No-Churn Red White & Blue Swirl Ice Cream Recipe (3 Ingredients) Step by Step
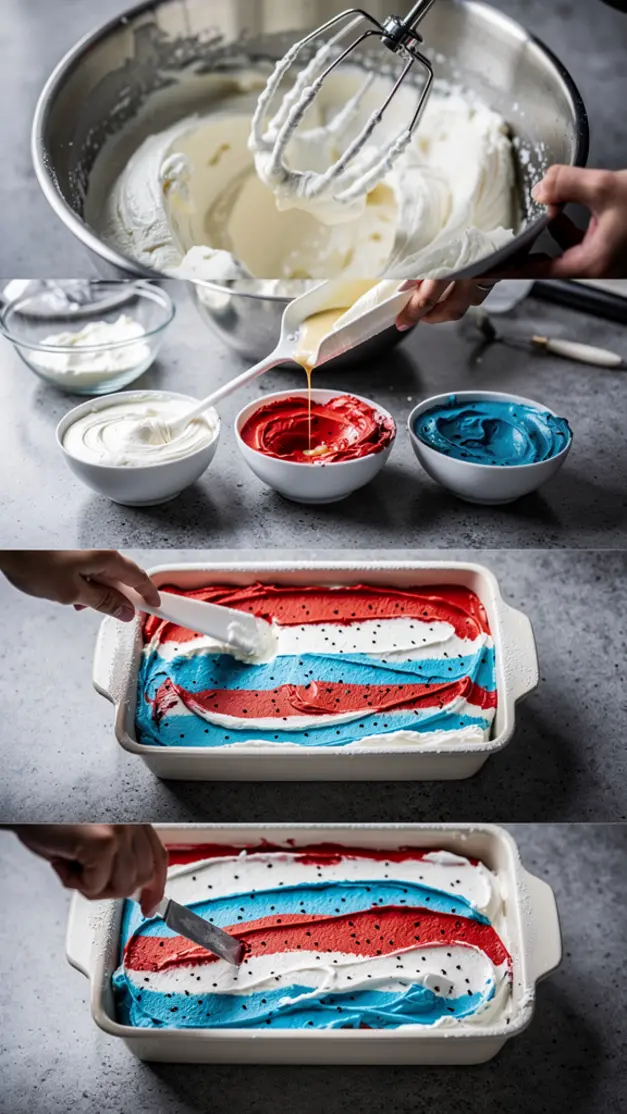
Step 1: Whip the Cream
First, pour the cold heavy whipping cream into a large mixing bowl. Using an electric mixer, beat the cream on medium-high speed until it forms stiff peaks. This usually takes about 3-4 minutes, but keep an eye on it—you don’t want to overbeat the cream, or it will turn into butter. The peaks should hold their shape when you lift the beaters out of the bowl. Once the cream is whipped, set it aside for a moment.
Step 2: Mix the Base
In a separate bowl, combine the sweetened condensed milk and vanilla extract. Stir them together until they’re fully mixed. This sweet, creamy mixture is what gives the ice cream its rich flavor and smooth texture. Once it’s combined, gently fold it into the whipped cream using a rubber spatula. Be careful not to deflate the whipped cream—you want to keep as much air in it as possible to ensure a light, fluffy ice cream.
Step 3: Divide and Color
Now comes the fun part! Divide the ice cream base evenly into three separate bowls. Leave one bowl as is—this will be your white layer. In the second bowl, add a few drops of red food coloring and stir gently until the color is evenly distributed. In the third bowl, do the same with blue food coloring. You can adjust the amount of food coloring to get the shade you want, but remember that the colors will soften slightly once the ice cream freezes.
Step 4: Layer the Ice Cream
Grab your loaf pan or freezer-safe container and start layering the ice cream. Use a spoon or spatula to add a layer of the white base, followed by a layer of red, and then a layer of blue. Repeat the layers until all the ice cream is in the pan. Don’t worry about making the layers perfectly even—this isn’t a cake! The goal is to create a marbled effect, so a little unevenness is fine.
Step 5: Swirl the Colors
Once all the ice cream is in the pan, take a butter knife or a skewer and gently swirl the colors together. Drag the knife through the layers in a figure-eight motion to create a beautiful marbled effect. Be careful not to overmix, or the colors will blend together too much and turn into a muddy purple. You want to see distinct swirls of red, white, and blue when you’re done.
Step 6: Freeze Until Firm
Cover the loaf pan with plastic wrap, pressing it directly onto the surface of the ice cream to prevent ice crystals from forming. Freeze the ice cream for at least 6 hours, or until it’s completely firm. I like to let it freeze overnight for the best texture. Once it’s frozen, your no-churn red white and blue swirl ice cream is ready to serve!
My Pro Tips for the Best 4th Of July No-Churn Red White & Blue Swirl Ice Cream Recipe (3 Ingredients)
- Tip 1: Chill your tools. For the best results, make sure your mixing bowl and beaters are well-chilled before you start whipping the cream. This helps the cream whip up faster and hold its shape longer. You can even pop them in the freezer for 10-15 minutes before you begin.
- Tip 2: Don’t overmix the colors. When you’re swirling the red, white, and blue layers together, less is more. A few gentle swirls with a knife are all you need to create a beautiful marbled effect. If you overmix, the colors will blend together and lose their vibrancy.
- Tip 3: Use natural food coloring. If you want the most vibrant colors possible, opt for natural food coloring. It’s made from plant-based ingredients and tends to produce richer, more intense hues than traditional food coloring. Plus, it’s a great option if you’re trying to avoid artificial dyes.
- Tip 4: Let it sit before scooping. If the ice cream is too hard to scoop straight out of the freezer, let it sit at room temperature for 5-10 minutes before serving. This will soften it just enough to make scooping a breeze, but it won’t melt too much.
- Tip 5: Get creative with mix-ins. While this recipe is delicious on its own, you can easily customize it by adding mix-ins like mini chocolate chips, crushed cookies, or even fresh berries. Just fold them into the ice cream base before you layer it in the pan.
Delicious Variations of 4th Of July No-Churn Red White & Blue Swirl Ice Cream Recipe (3 Ingredients)
- Cookies and Cream: Fold in crushed Oreo cookies or chocolate sandwich cookies into the white layer for a cookies-and-cream twist. The black specks from the cookies will look great against the red and blue layers.
- Berry Swirl: Add a layer of strawberry or blueberry jam between the colored layers for a fruity burst of flavor. Just warm the jam slightly to make it easier to swirl into the ice cream.
- Chocolate Drizzle: Before freezing, drizzle melted chocolate over the layers and use a knife to swirl it in. This adds a rich, chocolatey flavor that pairs perfectly with the vanilla base.
- Coconut Dream: Swap the vanilla extract for coconut extract and fold in shredded coconut for a tropical twist. This variation is especially delicious if you’re using coconut cream instead of heavy whipping cream.
- Sprinkle Surprise: Mix rainbow sprinkles into the white layer for a fun, festive touch. The sprinkles will add a pop of color and a little crunch to every bite.
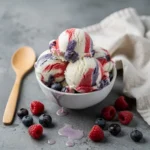
What to Serve With 4th Of July No-Churn Red White & Blue Swirl Ice Cream Recipe (3 Ingredients)
This ice cream is delicious on its own, but it’s even better when paired with other summer treats. Serve it in waffle cones for a classic ice cream shop experience, or scoop it into bowls and top it with fresh berries like strawberries, blueberries, and raspberries. The tartness of the berries balances the sweetness of the ice cream perfectly.
For a more decadent dessert, try serving the ice cream with warm brownies or a slice of pound cake. The contrast of warm and cold is always a hit, and the rich flavors of the brownies or cake complement the creamy ice cream beautifully. You can also drizzle a little caramel or chocolate sauce over the top for an extra touch of indulgence.
If you’re serving this at a party, consider setting up an ice cream sundae bar with all the fixings. Let your guests customize their sundaes with toppings like whipped cream, sprinkles, crushed nuts, and fruit. It’s a fun way to let everyone create their own perfect dessert, and it takes the pressure off you to plate everything yourself.
How to Store Leftover 4th Of July No-Churn Red White & Blue Swirl Ice Cream Recipe (3 Ingredients)
This ice cream stores beautifully in the freezer, so don’t worry if you have leftovers. Just transfer it to an airtight container, press a piece of plastic wrap directly onto the surface of the ice cream to prevent ice crystals, and seal the container tightly. It will keep for up to 2 weeks in the freezer, though it’s best enjoyed within the first week for the creamiest texture.
If the ice cream becomes too hard after freezing, let it sit at room temperature for 5-10 minutes before scooping. This will soften it just enough to make it easier to serve. Avoid microwaving the ice cream to soften it, as this can cause it to melt unevenly and lose its creamy texture.
You can also store individual portions in small containers or ice cream cups for easy grab-and-go treats. This is a great option if you’re meal prepping for a party or just want to have a quick dessert on hand for busy weeknights.
Frequently Asked Questions About 4th Of July No-Churn Red White & Blue Swirl Ice Cream Recipe (3 Ingredients)
- Can I make this ice cream ahead of time? Absolutely! This recipe is perfect for making ahead, since it needs to freeze for at least 6 hours before serving. You can prepare it up to 2 weeks in advance and store it in the freezer until you’re ready to serve.
- Can I use light or fat-free ingredients? I don’t recommend it. The heavy whipping cream and sweetened condensed milk are what give this ice cream its rich, creamy texture. Using light or fat-free versions will result in a icier, less creamy dessert. If you’re looking for a lighter option, consider serving smaller portions or pairing the ice cream with fresh fruit.
- Why is my ice cream icy? If your ice cream turns out icy, it’s likely because the whipped cream was overmixed or the ice cream wasn’t covered properly before freezing. To prevent this, make sure to whip the cream just until stiff peaks form, and press plastic wrap directly onto the surface of the ice cream before sealing the container.
- Can I make this recipe without food coloring? Of course! If you prefer not to use food coloring, you can skip it entirely and make a simple vanilla no-churn ice cream. You can still create a festive look by adding mix-ins like fresh berries or sprinkles.
- How do I get the best swirl effect? The key to a beautiful swirl is to layer the colors gently and avoid overmixing. Use a butter knife or skewer to create a few gentle swirls through the layers, but don’t stir too much, or the colors will blend together. You want to see distinct swirls of red, white, and blue when you’re done.
The Story Behind My 4th Of July No-Churn Red White & Blue Swirl Ice Cream Recipe (3 Ingredients)
I’ll never forget the first time I made this ice cream. It was the summer of 2020, and like so many people, I was looking for ways to bring a little joy into my life during a difficult time. I’d always loved baking and cooking, but I’d never tried making ice cream before. The idea of no-churn ice cream had been floating around in my head for a while, but I kept putting it off, convinced it would be too complicated.
Then, one afternoon, I found myself scrolling through Pinterest, looking for 4th of July dessert ideas. I saw all these gorgeous red, white, and blue treats—layered cakes, fruit tarts, even Jell-O molds—but nothing felt quite right. I wanted something simple, something that wouldn’t require a lot of time or fancy ingredients. That’s when I remembered the no-churn ice cream method. I decided to give it a try, splitting the base into three portions and tinting them with food coloring. I layered them in a loaf pan, swirled the colors together, and popped it in the freezer.
Six hours later, I pulled out the most beautiful ice cream I’d ever made. The colors were vibrant, the texture was creamy, and the flavor was just perfect. I served it to my family that night, and it was a hit. My kids loved the fun swirls, and my husband couldn’t believe how easy it was to make. Since then, this recipe has become a staple in our summer dessert rotation. It’s a reminder that sometimes the simplest things bring the most joy—and that you don’t need a lot of ingredients or fancy tools to create something truly special.
Pin This 4th Of July No-Churn Red White & Blue Swirl Ice Cream Recipe (3 Ingredients) Recipe for Later
I hope this recipe brings a little extra joy to your 4th of July celebrations this year. It’s so easy to make, and the results are absolutely stunning. Whether you’re hosting a big party or just enjoying a quiet evening at home, this no-churn red white and blue swirl ice cream is the perfect way to celebrate. Don’t forget to save this recipe so you can make it again and again—it’s a keeper!
4th Of July No-Churn Red White & Blue Swirl Ice Cream Recipe (3 Ingredients)
Ingredients
- 2 cups heavy whipping cream, cold
- 1 (14 oz) can sweetened condensed milk
- 1 teaspoon vanilla extract
- 0.5 teaspoon red gel food coloring
- 0.5 teaspoon blue gel food coloring
Instructions
- Prep the Base: In a large chilled mixing bowl, beat the cold heavy whipping cream with an electric mixer on high speed until stiff peaks form, about 3-4 minutes. Be careful not to overbeat.
- Add Condensed Milk: Gently fold the sweetened condensed milk and vanilla extract into the whipped cream until fully combined. The mixture should be smooth and creamy.
- Divide the Mixture: Divide the ice cream base evenly into three separate bowls. Leave one bowl plain (white). Add red gel food coloring to the second bowl and blue gel food coloring to the third bowl. Gently fold the coloring into each bowl until evenly distributed.
- Layer the Colors: Line a 9x5-inch loaf pan with parchment paper. Spoon alternating dollops of red, white, and blue ice cream mixtures into the pan. Use a knife or spatula to gently swirl the colors together for a marbled effect. Avoid overmixing to keep the colors distinct.
- Freeze: Cover the loaf pan with plastic wrap or aluminum foil and freeze for at least 6 hours, or until firm. For best results, freeze overnight.
- Serve: Once frozen, scoop the ice cream into bowls or cones and enjoy your festive 4th Of July No-Churn Red White & Blue Swirl Ice Cream!