Easy Homemade Strawberry Pop Tarts – Better Than Store-Bought in 3 Hours!

Table of Contents
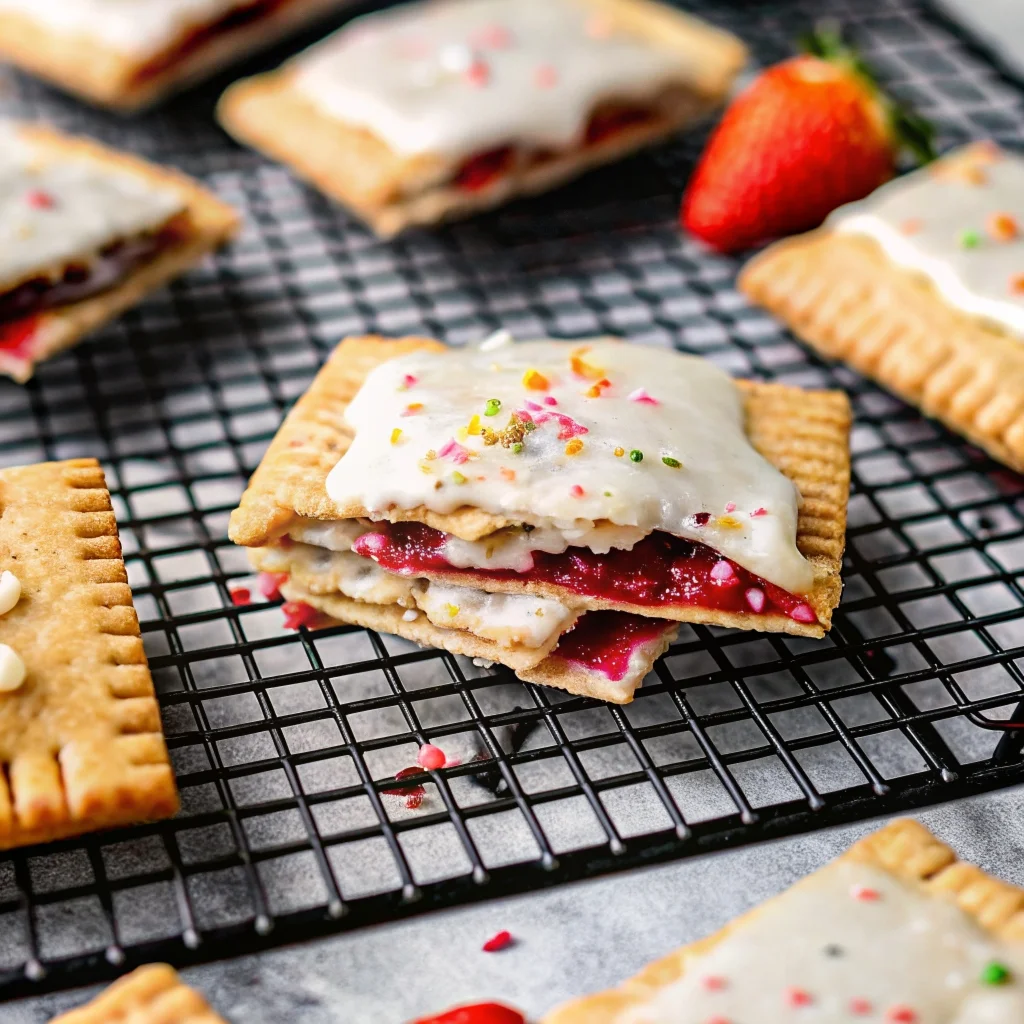
Easy Homemade Strawberry Pop Tarts: The Nostalgic Treat, Made Perfect
Store-bought pop tarts just don’t have much flavor at all – they’re surprisingly bland, with a cardboard-like crust and a filling that only tastes vaguely of strawberry. We’ve remedied these problems with these Easy Homemade Strawberry Pop Tarts. Imagine a flaky, buttery, all-butter pie crust that shatters slightly with every bite, enveloping a thick, vibrant, and tangy-sweet filling made from real strawberries. Then, it’s all topped with a classic white icing and a rainbow of sprinkles. This isn’t just an upgrade; it’s a completely new experience that captures all the nostalgic joy of the original with the incredible taste and quality of something made from scratch in your own kitchen. Perfect for weekend baking with kids, special breakfasts, or a thoughtful homemade gift, these pop tarts are guaranteed to become a new favorite. For another delicious from-scratch treat, try our Classic Cinnamon Rolls with Cream Cheese Frosting.
Why You’ll Love This Homemade Pop Tarts Recipe
- Incredible Buttery, Flaky Crust: An all-butter pie dough that puts any store-bought pastry to shame.
- Real Strawberry Filling: Fresh or frozen strawberries are cooked down into a thick, intensely flavorful jam – no artificial anything!
- So Much Better Than the Box: The taste and texture are on a completely different level. You’ll never go back.
- Surprisingly Achievable: With clear steps and helpful tips, this recipe is easier than you might think.
- Customizable Fun: Change up the filling, the icing, or the sprinkles to make them your own.
Your Simple Ingredients for the Perfect Strawberry Pop Tarts
For the Buttery Crust:
- 2½ cups all-purpose flour (spooned and leveled)
- 4 teaspoons sugar
- 2 teaspoons kosher salt
- 1 cup unsalted butter (2 sticks), chilled and cubed
- ½ cup cold water
For the Real Strawberry Filling:
- 16 oz (~450g) strawberries (fresh or frozen – thaw if frozen)
- 3 tablespoons honey
- 2 teaspoons lemon juice
For Assembly and Icing:
- 1 egg yolk (for sealing and egg wash)
- ½–1 cup powdered sugar
- 1–2 tablespoons milk
- Colorful sprinkles, crushed slightly
Pro Tip: The Secret to a Flaky Crust
The #1 rule for a flaky, tender pastry crust is to keep your butter COLD. Chilled butter cubes create steam as they melt in the oven, which pushes apart the layers of dough and creates that beautiful flakiness. Work quickly and pop the dough back in the fridge if it ever gets too warm or sticky.

How to Make Perfect Homemade Strawberry Pop Tarts
Phase 1: Make and Chill the Dough
Pulse Dry Ingredients with Butter: In a food processor, pulse together the flour, sugar, and salt. Add the chilled, cubed butter and pulse several times until the butter pieces are about the size of small peas.
Add Water: With the processor running, slowly stream in the cold water, pulsing until the dough just begins to come together.
Form and Chill: Turn the dough out onto a lightly floured surface and gently knead it into a ball – be careful not to overwork it. Flatten into a ½-inch thick rectangle, wrap tightly in plastic wrap, and refrigerate for at least 2 hours (or up to 2 days).
Phase 2: Make the Strawberry Filling
Blend and Strain: While the dough chills, make the filling. In a blender, combine the strawberries, honey, and lemon juice. Blend until smooth. Pour the mixture through a fine-mesh sieve directly into a saucepan, pressing to extract as much pulp as possible and leaving the seeds behind.
Cook the Jam: Bring the mixture to a simmer over medium heat. Cook, stirring occasionally, for 20-25 minutes, until it has reduced significantly and thickened. It should look a lot like ketchup – when you scrape the bottom of the pan, the jam should take a moment to run back together. Transfer to a bowl and let cool completely.
Phase 3: Roll, Cut, and Assemble
Preheat and Prep: Preheat your oven to 300°F (150°C) . Line a baking sheet with parchment paper.
Roll Out the Dough: Divide the chilled dough in half. On a well-floured surface, roll one half into a rough 14×14-inch square, about ⅛-inch thick. You should be able to see the work surface through it slightly.
Cut Rectangles: Use a knife, pizza cutter, or a stencil to cut the dough into rectangles, approximately 3.5 x 4.75 inches. You’ll need two per pop tart. Gather scraps, re-roll, and cut more.
Add Filling: Place half of the rectangles on the prepared baking sheet. Spoon about 1 tablespoon of the cooled strawberry filling onto the center of each, then spread it into a thin layer, leaving a ⅓-inch border around the edges.
Seal and Crimp: In a small bowl, beat the egg yolk. Brush a thin layer of the beaten yolk around the border of the filling on each bottom tart. Use a skewer or fork to poke a few holes (dock) in the top rectangles to allow steam to escape. Place a top rectangle over each filled bottom, pressing gently around the edges to seal. Use a fork to crimp the edges for a classic pop tart look.
Phase 4: Bake
Bake: Bake the assembled pop tarts for 30-35 minutes, until they are very lightly golden brown on top and the bottoms are slightly browned.
Cool Completely: Transfer the pop tarts to a wire rack and let them cool completely before icing.
Phase 5: Ice and Decorate
Make the Icing: In a small bowl, whisk together the powdered sugar and milk, adding the milk gradually until you reach a thick, spreadable consistency.
Ice and Sprinkle: Spread about 1 tablespoon of icing over the top of each cooled pop tart. Immediately sprinkle with crushed sprinkles before the icing sets. Let the icing set completely before serving.
Pro Tips & Easy Variations for Your Homemade Pastries
- Keep Dough Cold: If at any point the dough becomes too soft or sticky, pop it in the freezer for 10-15 minutes to firm up. This is crucial for flaky layers!
- Measure Flour Correctly: Spoon the flour into your measuring cup and level it off with a knife. Scooping can pack in too much flour, leading to a tough crust.
- Filling Variations: This recipe is a perfect base! Try it with blueberries, raspberries, cherries, peaches, or even a combination. You can also use a high-quality store-bought jam in a pinch, though the homemade filling is truly special.
- Chocolate Hazelnut Pop Tarts: Spread a thin layer of Nutella on the bottom crust instead of strawberry jam.
- Cinnamon Sugar Pop Tarts: Fill with a mixture of brown sugar, cinnamon, and a tiny bit of flour and butter.
- Freezer-Friendly: Bake the pop tarts without the icing and freeze them in an airtight container. When you’re ready, just pop them in the toaster to warm them up, then add the icing and sprinkles!
Serving Suggestions for the Perfect Treat
These pop tarts are a star on their own. Serve them for a special weekend breakfast, pack them in lunchboxes for a happy surprise, or arrange them on a platter for brunch or a bake sale. They’re also wonderful with a glass of cold milk, a hot cup of coffee, or a mug of tea.
Nutrition Information
(Approximate per pop tart, based on 8) Calories: 575, Fat: 41.3g, Carbohydrates: 48g, Protein: 5.3g, Sugar: 20g. A rich, indulgent, from-scratch treat.
Storage & Make-Ahead Instructions
- Store at Room Temperature: Keep iced pop tarts in an airtight container at room temperature for up to 3 days.
- Refrigerate: They will keep in the refrigerator for up to 6 days.
- Freeze Un-iced: For longer storage, freeze the baked, un-iced pop tarts in a single layer in an airtight container for up to 3 months. Thaw, then reheat in a toaster or warm oven before icing and serving.
Your Homemade Strawberry Pop Tarts Questions Answered
- Can I make the dough without a food processor?
- Absolutely! You can grate the cold butter into the flour mixture using a box grater, then use a pastry cutter, two forks, or your fingertips to work the butter into the flour until it resembles coarse meal. Then, stir in the cold water until the dough comes together.
- How long are they good for?
- Stored in an airtight container at room temperature, they’ll keep for about 3 days. You can store them in the refrigerator for up to 6 days.
- Can I freeze these and reheat them?
- Yes! For best results, freeze them without the icing. Place them in an airtight container and freeze for up to 3 months. To reheat, simply pop them in the toaster for a few minutes, then add the icing and sprinkles.
- Can I use frozen strawberries?
- You can, but make sure they are completely thawed before blending. If they’re still frozen, you’ll end up with a smoothie that won’t be strainable.
- What can I use instead of an egg yolk to seal the tarts?
- If you have an egg allergy, you can use a little milk or even water to brush the edges. It won’t be quite as effective a seal, but it will still work.
More Incredible Homemade Breakfast Treats to Try
If you love making breakfast extra special, you’ll adore our other from-scratch recipes. Our Easy Cinnamon Sugar Donut Bread is another favorite, and our Chocolate Pancakes are always a hit.
The Story Behind This Nostalgic Upgrade
Homemade Strawberry Pop Tarts are a beautiful example of how taking a little extra time to make something from scratch can transform a nostalgic childhood favorite into a truly special treat. This recipe honors the iconic look and feel of the original while completely reimagining its soul – swapping a bland, processed crust for a flaky, buttery, all-butter pastry, and replacing the artificial filling with a thick, vibrant, real-fruit jam. It’s a testament to the idea that the best recipes are often the ones that allow us to revisit cherished memories with a fresh perspective and a commitment to quality ingredients. This wonderfully nostalgic and delicious recipe is inspired by the version shared on The Crowded Kitchen by Lexi.
Pin This Nostalgic Recipe For Your Next Baking Project!
These homemade pop tarts will be the hit of any breakfast or brunch table. Save this image to your “Breakfast Recipes” or “Baking from Scratch” Pinterest board so you always have this winner ready. Did you make these beautiful, flaky tarts? We’d love to see your creation – tag us in your photos!

Homemade Strawberry Pop Tarts
Equipment
- Food Processor For quickly making the dough.
- Fine-Mesh Sieve For straining strawberry seeds from the filling.
- Rolling Pin For rolling out the dough evenly.
- Pizza Cutter or Sharp Knife For cutting clean rectangles.
Ingredients
- 2.5 cups all-purpose flour
- 4 tsp sugar
- 2 tsp kosher salt
- 1 cup (2 sticks) unsalted butter, chilled and cubed
- 0.5 cup cold water
- 16 oz strawberries (fresh or frozen, thawed)
- 3 tbsp honey
- 2 tsp lemon juice
- 1 egg yolk (for sealing)
- 0.5 to 1 cup powdered sugar
- 1 to 2 tbsp milk
- Colorful sprinkles, crushed
Instructions
- In a food processor, pulse flour, sugar, and salt. Add chilled butter and pulse until pea-sized. Stream in cold water, pulsing until dough comes together. Form into a rectangle, wrap in plastic, and chill for 2 hours.
- While dough chills, blend strawberries, honey, and lemon juice. Strain into a saucepan, discarding seeds. Simmer over medium heat for 20-25 minutes, stirring, until thickened like jam. Cool completely.
- Preheat oven to 300°F. Roll out half the dough to ⅛-inch thick on a floured surface. Cut into 3.5×4.75-inch rectangles. Repeat with remaining dough and scraps.
- Place half the rectangles on a parchment-lined baking sheet. Spoon 1 tbsp filling onto each, leaving a border. Brush edges with beaten egg yolk. Dock top rectangles with a fork, place over filling, and crimp edges.
- Bake for 30-35 minutes until lightly golden. Cool completely on a wire rack.
- Whisk powdered sugar and milk until a thick glaze forms. Spread about 1 tbsp over each cooled pop tart and immediately top with crushed sprinkles. Let set before serving.